Programming Instructions for Garage Door Opener Remotes
Posted by Charlene Pepiot on 9th Nov 2023
Programming Garage Door Opener Remotes
Need to program your remote but don’t have the owner’s manual anymore? Follow these easy DIY instructions to learn how to program a Genie garage door opener along with select Chamberlain and LiftMaster opener models. North Shore has been in the industry for decades, so you can trust us with all of your remote needs.
How to Program the Genie Company's Garage Door Remotes
| To determine which Genie remote programming instructions are compatible with your model, check the learn indicator light on your opener. If the light is red, it uses Intellicode® I. If the light is blue, proceed to the Intellicode II or III programming instructions. | 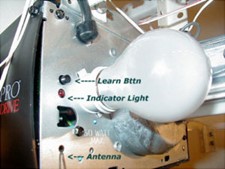 |
Programming Genie Intellicode I Remote Transmitters
- Gently press and release the receiver’s Learn Code button on the power head of your door operator. This small, black, unmarked button is located behind the light lens at the motor head and is near the floppy six-inch antenna wire that protrudes from the motor head. When pressed, a radio signal indicator light will start blinking red for 30 seconds.
- After pressing the Learn Code Button once, press your transmitter button three times for your system to grab the frequency and code in it. Keep the transmitter you want to be tuned at least two feet away from the power head while tuning.
- Press the transmitter button once more to test the system. Your door should move.
To erase all Intellicode remotes and wireless keyless entry, hold down on the learn remote button until the indicator light stops blinking, then proceed to Step one listed above.
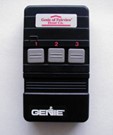
How To Program Intellicode II’s Genie IntelliG, TriloG, SilentMax, PowerMax, GPower and PowerLift Series Openers
Intellicode II models include: 4024, 3024, 4042, 3042, 4022 and 3022 along with 4064, 3064, 4062, 3062, 2564 and 2562. If you look at the bottom of your Genie motor cover; you should see a set of black buttons as depicted in the drawing below, along with two LED lights shown here in grey.

- Press and hold down the square button on the motor head until the round blue LED light comes on, then release the square button.
- The long purple LED button will start to blink. If the blue light stays on, go to the instructions below for programming Intellicode III remotes.
- While the long LED is blinking, hold the remote four or five feet away and press three to five times until the door activates. Your remote is now programmed.
How To Clear All Remotes and Keypads from System
To clear all remotes and the keypad from the system, follow the above steps one and two. After Step two, while the purple LED is blinking, press and hold both triangular buttons until the purple LED goes out. This clears the radio receiver's memory.
Programming Intellicode III's Genie IntelliG and TriloG Series (from 2009 to July 8, 2011)
- Press and hold down the square button on the motor head until the round blue LED comes on, then release the button. Press the square button once more until the long purple LED comes on and then release. The purple LED should be blinking.
- To unlock the programming feature, use a remote that already operates the unit and press it once. The purple light should turn solid.
- Hold the new remote four or five feet away and press three to five times until the door activates. The remote is programmed.
Clearing Memory for Genie Remotes and Keypad (if Present)
- Follow steps one and two above or step one if your model was manufactured between 2009 and July 8, 2011. To tell when your remote was manufactured, see the serial number on the front of the remote. The first two digits equal the year, and the next three digits equal the day of the year.
- While the long purple LED is blinking, press and hold the Up and Down triangle buttons at the same time until both LEDs flash blue and go off. This clears the receiver's memory. All previously programmed remotes will no longer work with your door.
- To re-program each remote, follow steps one through three of the programing instructions relative to your opener above.
Programming Digital Remote Transmitters with Internal Set Switches
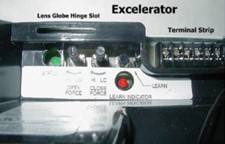
| These transmitters work by matching the settings on the internal code setting switches with the same set of switches in the receiver on the garage ceiling. The receiver is located either behind the light lens of the Genie garage door opener motor head or inside an external small rectangular box on the ceiling, which is connected to the motor head by a set of wires. | 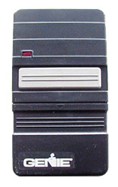 |
Note: The frequency of the transmitter must be the same as the receiver on the ceiling for it to work. Genie has been making the 390 MHz frequency exclusively since 1998.
How To Program Multi-Button Digital Remotes with Internal Set Switches
These garage door opener transmitters have two smaller switches to the right of the internal code setting switches. The small right switch should be set according to how many code setting switches are in your receiver (either 9 or 12). The small left switch is for programming purposes. To program a button for one of your doors, follow the instructions below:
- Match the settings on the internal code setting switches with the same set of switches in the receiver on the garage ceiling, as described in the previous programming instructions.
- Move the small programming switch to "S" (for Set) and press the transmitter button you wish to have assigned to the above door.
- Return the programming switch to "R" (for Run) and press the assigned transmitter button to test the door and start the door moving. Follow the same procedure for each additional door you wish to program.
How To Install a Genie GIC390 Intellicode Receiver
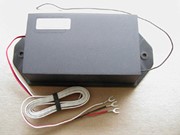
The terminals labeled one, two and three on the receiver are connected to their corresponding terminals on the garage door opener power head labeled one, two and three.
The color-coded wires correspond as follows:
- White = one
- Black = two
- Red = three
Wiring connections inside the GIC receiver plastic cover are as follows:
- Red = one
- Black = two
- White = three
Note that these wire connections are in a different order than the connections to the motor head.
How To Install a Genie GIC390 Receiver Using 24 VAC Power Pad
For installations using a Power Pak plug-in, connect the two terminals on the power pack to terminals one and three on the receiver, which are color-coded white (one) and red (three). The receiver's white wire (one) also connects to terminal one on the garage door opener power head. The receiver's remaining black wire (two) connects to terminal two on the power head.
How To Install a Genie 36163R Universal Intellicode Receiver
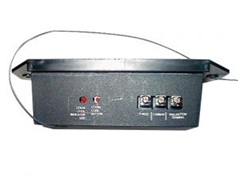
This Genie Intellicode Radio Receiver connects differently than previous versions of Genie external receivers. The universal remote is powered through the terminals marked "power" and "common." A Genie garage door opener which has only three terminals on its motor head will use the terminals on the motor head marked one for common and three for power. If you have a Genie garage door opener with more than three terminals, an external 24 VAC adapter will need to be purchased to supply power to this receiver.
For example, if you are replacing an existing Genie external receiver, the red wire connects to the "power" terminal on the new receiver, the white wire connects to the "common" and the black wire connects the terminal marked "wall button."
If you are connecting this receiver to a garage door opener with only two terminals, or having more than three terminals, you need to purchase a 24 VAC power adapter. The adapter plugs into your garage outlet and wires from the power pack are connected to the terminals on the receiver marked "power" and "common." Then connect the wires from "wall terminal" and "common" to terminals one and two, respectively, on your garage door opener. These are the same terminals that connect to your wall button.
How To Program Chamberlain, LiftMaster and Sears Garage Door Openers
Programming 971LM and 973LM, 371LM and 373LM Security Plus Transmitters
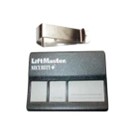
- Press and release the square colored "Smart" button on the garage door opener motor unit. The smart indicator light will glow steadily for 30 seconds. The 971LM and 973LM remotes have a corresponding amber or red square Learn button. The 371LM and 373LM have a corresponding purple square Learn button. The Learn buttons are located on the motor head near the terminal strip for wire connections.
- Within 30 seconds, press and hold the button on the hand-held remote.
- Release the button when the motor unit light blinks. This means it has learned the code. If light bulbs are not installed, you will hear two clicks.
Programming the 890MAX and 893MAX

- Press and hold the Program button on the remote control until the LED on the front of the remote control turns on.
- Press and release the remote control button you wish to use the number of times corresponding to the garage door opener type and Learn button described below:
|
# of Presses |
Garage door Opener Type |
|
1 |
Security Plus 2.0 (Yellow Learn Button) |
|
2 |
315 MHz Security Plus (Purple Learn Button) |
|
3 |
390 MHz Security Plus (Red/Orange Learn Button) |
|
4 |
390 MHz Billion Code (Green Learn Button) |
- To exit programming mode, press and release any remote control button except the button that was just programmed.
- Press and release the Learn button on the garage door opener or door control.
- Press the remote control button programmed in step two until the garage door opener lights flash or just hold it for four seconds. Test the remote control to confirm it works.
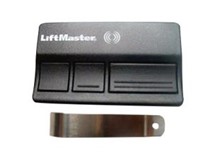
Model 375LM, 375UT and 380UT Programming Instructions for Dip-Switch Remotes

- Slide open the bottom front of the remote transmitter to expose the DIP switches and Program button.
- Match the DIP switch settings with the settings on an existing remote or on the receiver setting located on the ceiling. Look for the floppy antenna wire to find the receiver.
- Press the Program button (silver box with a small black button on top) on the remote transmitter until the LED lights up.
- Select one of the two remote transmitter buttons that you intend to use for opening the door.
- Press this button the number of times shown on the chart based on the brand and the number of DIP switches listed in the description. The code is accepted when the door activates.
- Press the Program button on the remote transmitter to exit programming mode.
- The programming is now complete. Press the selected button to test the remote.
|
# TIMES TO PRESS BTN |
BRAND |
DESCRIPTION |
YEAR |
|
375UT/380UT |
|||
|
11 |
CHAMBERLAIN |
9 POSITION |
90-92 |
|
12 |
CHAMBERLAIN |
9 POSITION CANADA |
90-92 |
|
13/16 |
GENIE |
12 POSITION |
90-95 |
|
14 |
LINEAR MULTICODE |
10 POSITION |
76 |
|
15 |
CHAMBERLAIN |
8 POSITION |
83-89 |
|
16 |
STANLEY/MULTICODE |
10 POSITION |
76 |
|
17/20 |
GENIE |
9 POSITION |
85 |
|
18 |
LINEAR |
8 POSITION |
76 |
|
19 |
CHAMBERLAIN |
7 POSITION |
83-89 |
Get More with North Shore Commercial Door!
Once you're done programming your remote transmitter, be sure to take your garage to greater heights by shopping North Shore's array of Genie's garage accessories. Also, stay on top of any potential garage issues as components wear out by reading our Guide to Garage Door Maintenance!
Still Curious About Programming Remotes or Don't See Your Model?
Please reach out to us! Our in-house experts can help you with all of your remote and door-related questions. Get in touch with our support crew:
- Live chat: Click the green "Contact Us" button on the right
- Call: 800-783-6112
- Email: support@northshorecommercialdoor.com